
Writing a Solana Raydium sniper in Rust part 2
This is part two of this series, where we are creating a Solana sniper bot for Raydium from scratch in Rust. See the first post here which includes an introduction about why we use a compiled language instead of JavaScript, as well as a brief introduction about me. You can find the latest GitHub source here, which will be updated with each new post.
Setting up a logger
Using logging in any software is essential, as it helps with debugging. Standard log levels include trace, debug, info, warn, and error.
For logging, we will use env_logger to configure the standard logger, and log to write logs at different levels.
Cargo.toml
# add under workspace.dependencies in root Cargo.toml
env_logger = "0.11.6"
log = "0.4.22"
# add under dependencies in utils/Cargo.tml
env_logger = { workspace = true }
log = { workspace = true }
# add under dependencies in sniper/Cargo.tml
log = { workspace = true }
We use env_logger to modify Rust's standard log format so that all logs include timestamps formatted to milliseconds. This helps with orientation later by also displaying the file we are logging from, as shown in the image below.

Terminal output of a started websocket in our rust program
Inside utils/src/env/env.rs, update the rest of the code with the following:
use std::{env, fmt, fs, io};
use std::path::Path;
use std::sync::Arc;
use solana_program::native_token::lamports_to_sol;
use crate::env::errors::EnvErrors;
use env_logger::{Builder, Env as EnvBuilder}; //alias so we don't clash with our own Env struct ;
use log::{LevelFilter};

pub struct Env {
    pub loglevel: Arc<LevelFilter>, // add LevelFilter eg enum warn, info, debug etc
    pub websocket_endpoint: Arc<String>,
    pub rpc_endpoint: Arc<String>,
    pub private_key: Arc<String>,
    pub swap_amount: Arc<u64>,
    pub swap_priority_fee: Arc<u64>,
}

impl Env {
    pub fn new() -> Result<Self, EnvErrors> {
        // Test if .env exists or give the option to create one from .env.dist
        let path = Path::new(".env");
        if ! path.exists() {
            println!("Could not find .env, would you like to use .env.dist as a template instead? (y/n)");
            create_env().expect("Failed creating .env file");
        }
        dotenv::from_path(".env").ok();

        /* Read LOG_LEVEL from .env */
        let loglevel = Arc::new(parse_log_level(env::var("LOG_LEVEL")?));

        let websocket_endpoint = Arc::new(env::var("WEBSOCKET_ENDPOINT")?);
        let rpc_endpoint = Arc::new(env::var("RPC_ENDPOINT")?);

        let private_key = Arc::new(env::var("PRIVATE_KEYPAIR")?);
        let swap_amount = Arc::new(env::var("SWAP_AMOUNT")?.parse::<u64>().unwrap());
        let swap_priority_fee = Arc::new(env::var("SWAP_PRIORITY_FEE")?.parse::<u64>().unwrap());

        Ok(
            Self {
                loglevel, // add loglevel to initialization of our struct
                websocket_endpoint,
                rpc_endpoint,
                private_key,
                swap_amount,
                swap_priority_fee,
            }
        )
    }

    pub fn setup_logger(&self) {
        // setup our custom logging format
        let env = EnvBuilder::default();

        Builder::from_env(env)
            .filter_level(*self.loglevel) // level from .env
            .format_level(false)
            .format_timestamp_millis() // display timestamp in milliseconds
            .init();
    }
}

impl fmt::Display for Env {
    fn fmt(&self, f: &mut fmt::Formatter) -> fmt::Result {
        writeln!(f, "===================== ENVS Loaded =====================\r\n\
        websocket_endpoint: {:?}\r\n\
        rpc endpoint:       {:?}\r\n\
        private wallet:     {:?}\r\n\
        swap amount:        {:?} sol\r\n\
        swap_priority_fee:  {:?} sol\r\n\
        total per trade:    {:?} sol\r\n\
        =====================================================",
                 self.websocket_endpoint,
                 self.rpc_endpoint,
                 self.private_key,
                 lamports_to_sol(*self.swap_amount),
                 lamports_to_sol(*self.swap_priority_fee),
                 lamports_to_sol(*self.swap_amount.clone() + *self.swap_priority_fee.clone())
        )
    }
}

fn create_env() -> std::io::Result<()> {
    let source = ".env.dist";
    let destination = ".env";

    println!("Do you want to copy '{}' to '{}' (y/n)?", source, destination);

    let mut input = String::new();
    io::stdin().read_line(&mut input)?;

    // Trim input and check the response
    if input.trim().eq_ignore_ascii_case("y") {
        // Perform the copy
        fs::copy(source, destination)?;
        println!("File successfully copied to '{}'.", destination);
    } else {
        println!("Operation canceled.");
    }

    Ok(())
}


// Parse LOG_LEVEL from .env to LevelFilter or default to INFO
fn parse_log_level(log_level: String) -> LevelFilter {
    match log_level.to_lowercase().as_str() {
        "off" => LevelFilter::Off,
        "error" => LevelFilter::Error,
        "warn" => LevelFilter::Warn,
        "info" => LevelFilter::Info,
        "debug" => LevelFilter::Debug,
        "trace" => LevelFilter::Trace,
        _ => LevelFilter::Info // defaults to info, if wrong loglevel given
    }
}
Inside Utils/src/env/env.rs we added this new method inside impl:
pub fn setup_logger(&self) {
        let env = EnvBuilder::default();
         Builder::from_env(env)
            .filter_level(*self.loglevel)
            .format_level(false)
            .format_timestamp_millis()
            .init();
}
env_logger, set the log level from our .env file, and configure it to display timestamps in milliseconds. For other ways to customize the standard logging format, refer to the `env_logger documentation here.
The &self keyword indicates that this is now a callable method within our env struct.
Finally update main.rs in sniper/srv/mains.rs to:
use utils::env::env::Env;

#[tokio::main]
async fn main() {
    /* Load in ENV from .env, or suggest creating from .env.dist */
    let env = Env::new().unwrap();
    env.setup_logger();
}
With that in place, we call setup_logger to change the standard logging format, and we will now see logs with millisecond precision. We can use the debug!, info!, warn!, and error! macros to specify log levels when logging events or the state of parts of our program.
Subscribing to Raydium events
To listen for all new tokens created on Raydium, we first need to understand a few concepts.
AMM
When we refer to a new token on Raydium, we are actually talking about a new liquidity AMM (Automated Market Maker) pool. For regular token swapping on Raydium, it is common practice to use their comprehensive main JSON file, which contains account addresses for all tokens. This file is updated several times a day and exceeds 500 MB in size. However, for sniping, this approach is not viable due to its size and update frequency. Instead, we need to find an alternative way to collect token addresses within the first few ms after a new token is released.
An AMM pool is paired with either SOL or USDC for trading. This is why new tokens often appear as <token>/WSOL or <token>/USDC on platforms like Dexscreener. `WSOL refers to wrapped SOL, which is necessary for using SOL in swaps. This wrapping process allows SOL to be compatible with the SPL token standard used by Solana. However, this logic is often abstracted away, so users may not need to handle wrapping directly.
Transactions
In Solana, transactions are the process of transferring tokens or interacting with smart contracts on the blockchain. Each transaction consists of one or more instructions that are executed on the network. Solana’s high throughput is achieved through its Proof of History (PoH) consensus mechanism, which timestamps and orders transactions. Transactions are processed in parallel, allowing for faster confirmation times. A typical transaction includes a fee paid to validators, a signature from the sender, and updates to accounts or smart contracts. Solana’s scalability ensures transactions are processed quickly and efficiently.
For our sniper, this is essential knowlede as we listen for interactions with Raydium’s smart contract, specifically the initialize2 event, which is triggered when a new liquidity pool is created.
Commitment Levels
In Solana, commitment levels represent different stages in the transaction lifecycle. At the ‘processed’ level, a transaction is received by the network and the leader is proposing that given transaction along with others in a block, which typically takes from 10 ms to 3 seconds, depending on network congestion. Then, if the transaction matches the smart contract(s) it’s interacting with and has the required funds for its actions, it will be confirmed. Finally, the transaction reaches the ‘finalized’ stage once the leader and corresponding voters have processed the block containing the transaction.
Websocket subscriber
Now with a few basics under our belt, lets go ahead and create our websocket subscriber.
Create the file sniper/src/oracle/websocket.rs
use std::sync::Arc;
use solana_client::{
    nonblocking::pubsub_client::PubsubClient,
    rpc_config::{RpcTransactionLogsConfig, RpcTransactionLogsFilter},
};
use solana_sdk::commitment_config::{CommitmentConfig, CommitmentLevel};
use futures::StreamExt;
use log::info;

pub struct SolanaSubscriber {
    client: PubsubClient,
    config_level: CommitmentConfig,
    subscribe_to: Vec<String>
}


impl SolanaSubscriber {
    pub async fn new(ws_url: Arc<String>, config_level: CommitmentConfig, subscribe_to: Vec<String>) -> Self {
        let client = PubsubClient::new(ws_url.clone().as_str())
            .await
            .expect(format!("Failed to connect to {}", ws_url).as_str());

        SolanaSubscriber {
            client,
            config_level,
            subscribe_to
        }
    }

    pub async fn start_thread(&self) {
        info!("Starting Solana websocket subscriber");
        let subscribe_to = self.subscribe_to.clone();
        let config_level = self.config_level.clone();
        let (mut stream, _) = self.client.logs_subscribe(
            RpcTransactionLogsFilter::Mentions(
                subscribe_to
            ),
            RpcTransactionLogsConfig {
                commitment: Some(config_level),
            }
        ).await.expect("Failed to subscribe to Logs!");

        loop {
            while let Some(response) = stream.next().await {

                for log in &response.value.logs {
                    /* skip all events that does not contain initialize2 eg token create */
                    if !log.contains("initialize2") {
                        continue
                    }
                    info!("Received tx https://solscan.io/tx/{}", response.value.signature);
                }
            }
        }
    }
}
Update sniper/src/main.rs
mod oracle;
use solana_sdk::commitment_config::CommitmentConfig;
use utils::env::env::Env;

#[tokio::main]
async fn main() {
    /* Load in ENV from .env, or suggest creating from .env.dist */
    let env = Env::new().unwrap();
    env.setup_logger();

    let subscribe_to_raydium = vec![
        "675kPX9MHTjS2zt1qfr1NYHuzeLXfQM9H24wFSUt1Mp8".to_string()
    ];

    /* Listen for all events regarding Raydium */
    let subscriber = oracle::websocket::SolanaSubscriber::new(
        env.websocket_endpoint.clone(),
        CommitmentConfig::processed(),
        subscribe_to_raydium
    ).await;

    subscriber.start_thread().await;
}
create sniper/src/oracle/mod.rs
A lot happened here, so let’s break it down and go over it bit by bit.
In sniper/src/oracle/websocket.rs, we created a new struct called SolanaSubscriber. In the new method, we simply check whether we can connect to the WSS endpoint from the .env file, or throw an error if that’s not the case. Also, note that in new, we use solana_client::nonblocking::pubsub_client::PubsubClient, where nonblocking is crucial. To maintain speed with many moving parts in our software, we avoid any render-blocking code that could compromise performance and introduce unnecessary delays. Sniping is most efficient down to the millisecond.
If we make it past ::new, we are good to go and ready to boot up our WebSocket subscriber.
Inside the start_thread method, we create a new stream inside a loop that runs indefinitely, keeping our program active until we send an exit signal, such as pressing Ctrl + C. This stream is initialized with subscribe_to, where we provide it the address 675kPX9MHTjS2zt1qfr1NYHuzeLXfQM9H24wFSUt1Mp8, the AMM v4 (OpenBook) smart contract address, along with the commitment level 'processed'. This is the earliest stage at which we can discover a new token, but it’s also the most unstable. We might attempt to swap against a token that never actually exists due to issues like an incorrectly filled smart contract, a missing Serum order book, insufficient funds, timeouts, or other problems. We also parse each log received from our subscriber and check if it contains initialize2. While 675kPX9MHTjS2zt1qfr1NYHuzeLXfQM9H24wFSUt1Mp8 is a legacy address, it is still widely used. Towards the end of this series, we will explore how to use the newest contract to make the sniper future-compatible.

Terminal output of a running Solana websocket in our program
https://solscan.io/tx/7RKF411YTojKv51Yq25ivqnj3HYz2MriNj47bFy73B83RSxrwoUupjWptntf7XKpQSBsGYLrQxcefnBEKsfpoRj https://solscan.io/tx/5JCD9rtXWiHsRCKbNReBcaA7nFVvaaELXkdcSrb6j1U4jYyarG8akVSqPjErq6dGRwmx2USD4zGESrPf7a6dh2R https://solscan.io/tx/4R4vFQAKPapyWUF2khE8Wwe3q75LiyCipa1tJVtshFvVpMWiFjhNmZa9QYribAgRd9zetYnv4zzLvmUACfg4efQf https://solscan.io/tx/Xb2VHwfmHRANsNzsSWXsDyVKw2rdUyg1owvSLGN9GfHNZJZ4VzFWfQEqKt7LD2e2JS5gsuNafNDzNtYkJpPSmG5
Setting up on a Linode server
Note that the setup script provided below is not production-ready. You should, at the very least, restrict access to the server to only your own IP address and use an ECDSA or RSA key for security. If you do not have experience with server operations, you should consult an expert. The script provided is intended only as a quick starting point for testing in an environment that is close to optimized.
I choose Linode because they offer 30GPS internet speed and competitive priced cloud resources, you can also get started with Linode at $100 credit, to try it out.
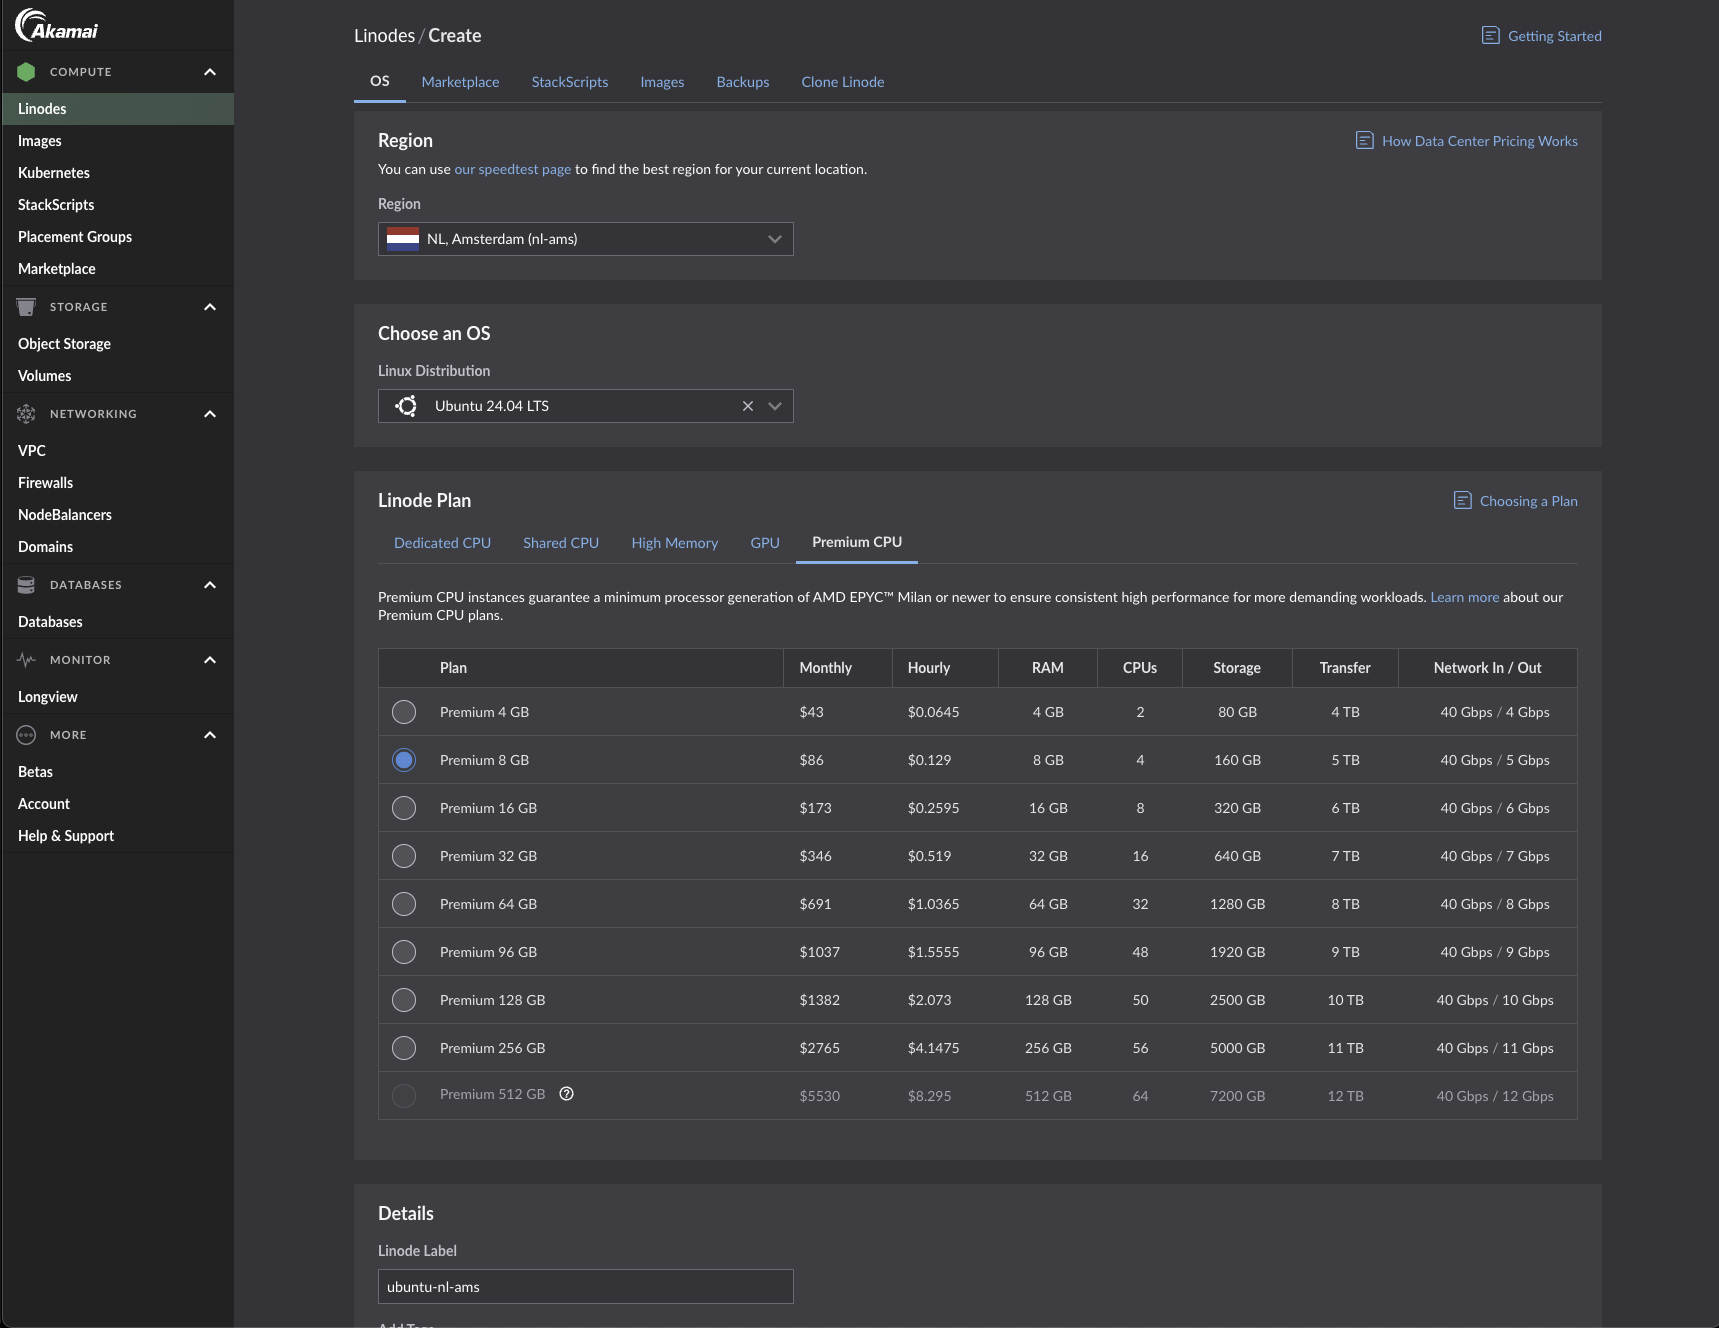
Linode starting a VPS
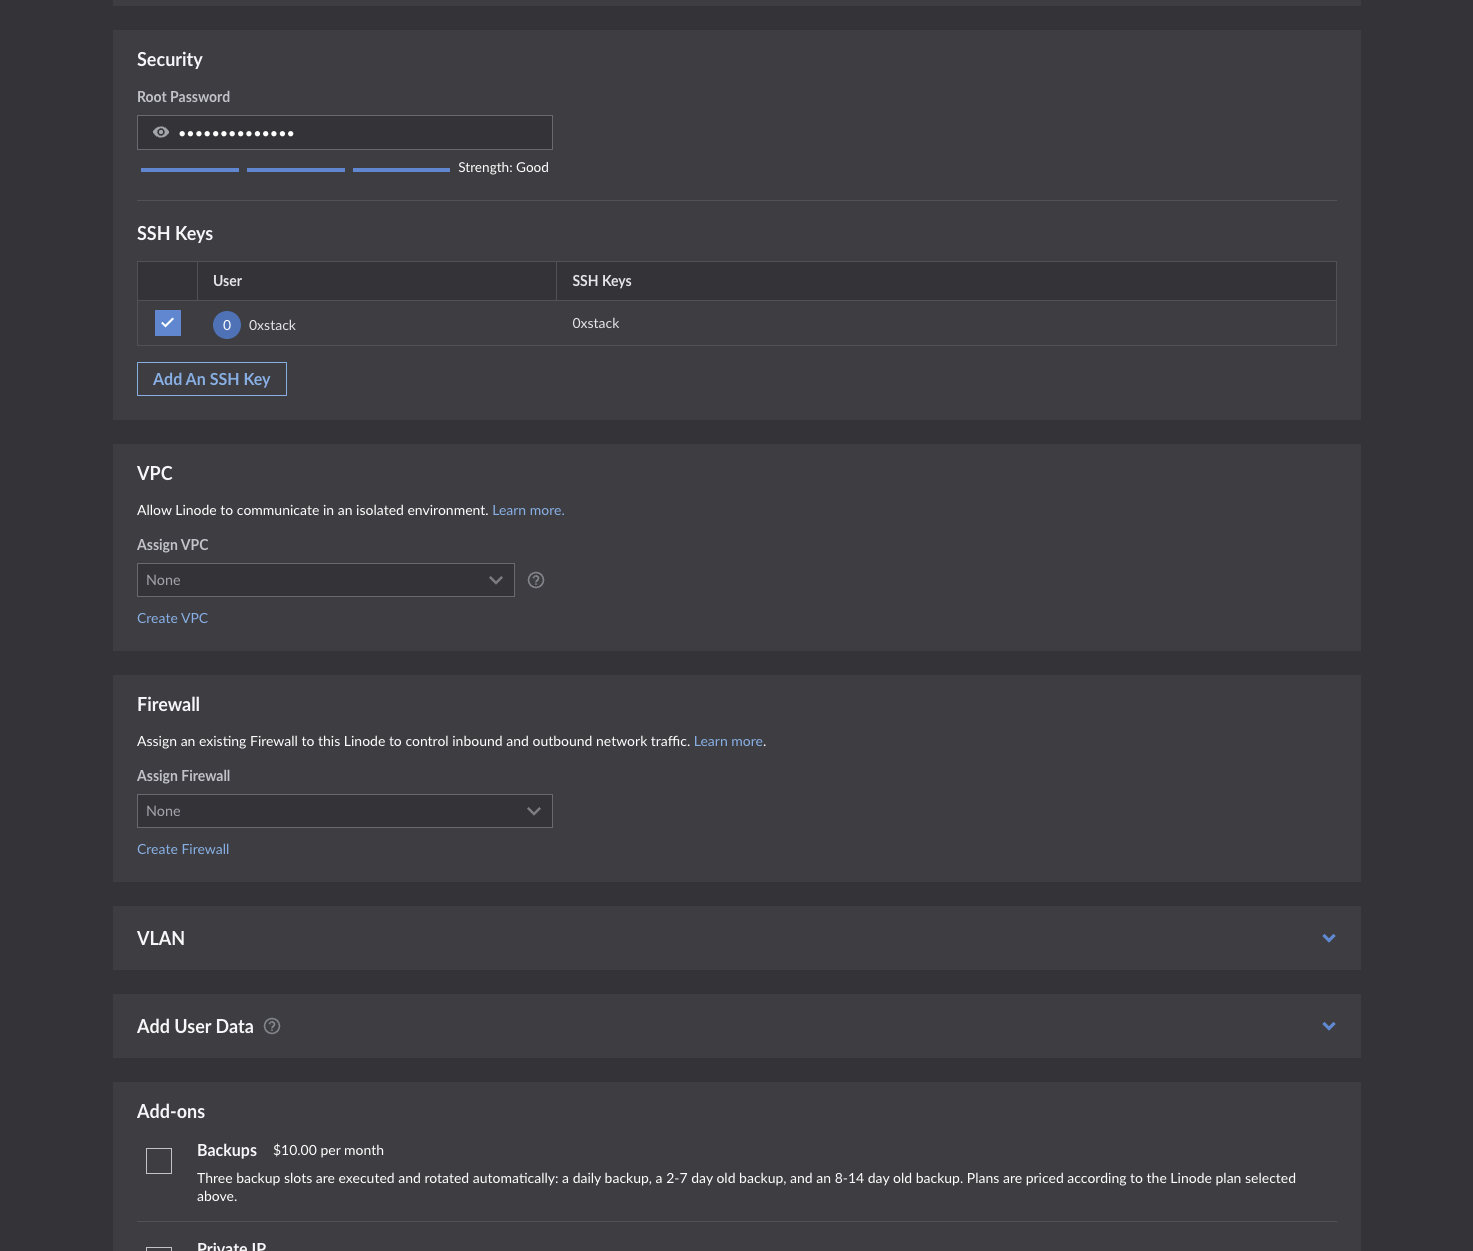
Linode starting a VPS
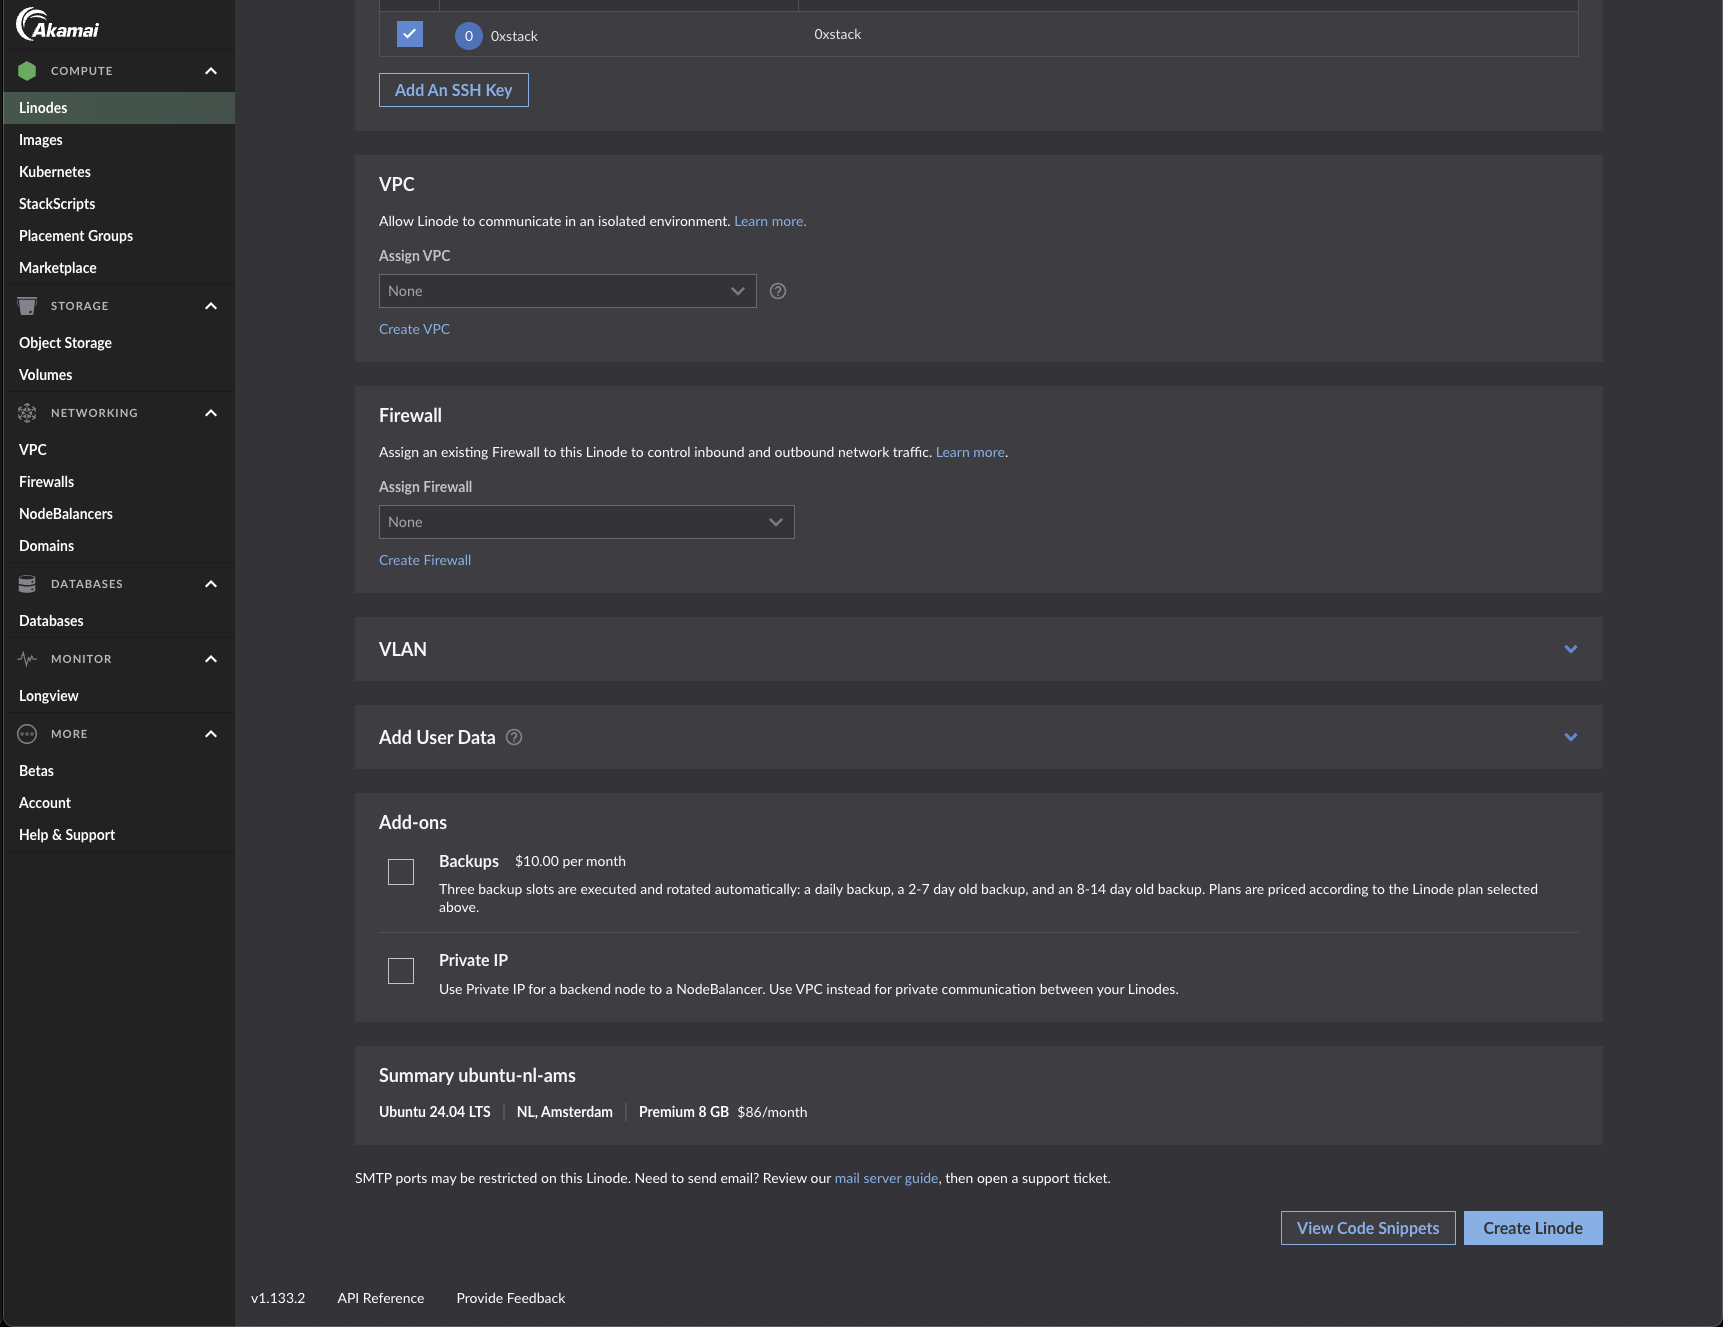
Linode starting a VPS
Choose a premium CPU; you do not want to share CPU cores with other instances, as this can degrade performance, especially when sniping. As for the location, I chose it because it is close to Helius.dev’s staked validator, which we will use later on with a staked connection. Other considerations include proximity to a Cloudflare endpoint, as most providers set up their WSS and RPC endpoints to proxy through Cloudflare for better security.
ssh into your server and run the prepare_linode.sh
# Clone the project to get started
git clone https://github.com/weestack/Solana-Sniper.git
cd Solana-Sniper
bash prepare_linode.sh
source ~/.bashrc
Running bash prepare_linode.sh will install Rust and protoc, which are required. It also replaces the nameserver in resolv.conf with Cloudflare's for lower network latency.
when asked which installation type, as the screenshot below, use 1 eg default:
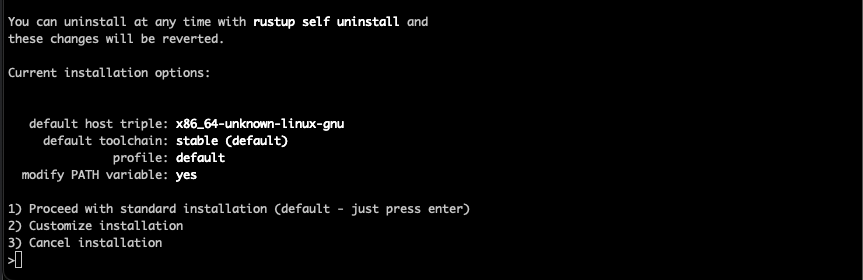
Accepting default rust installation
Now run the below to build the sniper and run it:
# note if you meet an issue about cargo not existing, run source ~/.bashrc
cargo build --release
# Run the sniper
./target/release/sniper
Websocket comparison
For this series, I have compared QuickNode against Helius.dev, both efficient providers in Solana RPC and WSS.

Helius.dev results
[2025–01–09T02:38:40.223Z sniper::oracle::websocket] [2025–01–09T02:39:59.082Z sniper::oracle::websocket] [2025–01–09T02:40:12.299Z sniper::oracle::websocket]

Quicknode results
[2025–01–09T02:38:40.546Z sniper::oracle::websocket] [2025–01–09T02:39:59.333Z sniper::oracle::websocket] [2025–01–09T02:40:12.424Z sniper::oracle::websocket]
In the first transaction, Helius was 323ms faster than Quicknode. In the second transaction, Helius was 251ms faster than Quicknode. In the third transaction, Helius was 125ms faster than Quicknode.
For the purpose of building an efficient sniper, we will use Helius. However, this is not because their WSS endpoint is faster. To gain a top position, we won’t even be using helius.dev’s WSS endpoint; instead, we will only use their staked RPC endpoint, which costs $49 a month with the developer plan. More about that later.
Does the above result mean that Helius.dev is superior to QuickNode? Absolutely not. This was just a quick comparison. Staying ahead of the network is not an easy task, and both providers excel at it. In addition to simple WSS and RPC endpoints, QuickNode also offers a wide range of different API endpoints and services for Solana that would definitely be handy for any Solana developer. Both providers excel in different areas of providing Solana services.
Up next
In the next article, we’ll dive deeper into Solana transactions and extract the necessary accounts to perform swapping. Thanks for reading this tutorial! Don’t forget to subscribe so you won’t miss the next part of the series.
Disclaimer
The information provided in this series of articles is for educational purposes only and should not be considered financial or investment advice. Trading, including sniping tokens, carries significant risks, and there is no guarantee of profit.
Any decisions you make based on the content shared here are solely your responsibility. I am not liable for any financial losses incurred as a result of implementing the strategies, code, or techniques discussed in these articles.
Always trade responsibly. Never risk more money than you can afford to lose. It is essential to conduct your own research and consult with a professional financial advisor if necessary before engaging in any trading activities.